Maximum-Tech.net is reader-supported. When you buy something through links on our site, we may earn an affiliate commission. As an Amazon Associate, I earn from qualifying purchases
PC Keeps Restarting Before Bios – 5 Reasons And Fixes [2022]
If your PC keeps restarting before BIOS and the screen goes black whenever you press the power button, then we have the solution to your problem.
This issue can occur for many reasons, which is why we have come up with many solutions to this annoying concern.
Not only that, but if your PC is restarting before the Windows loads, then too, this post will help you out.
Before hiring an expert for this issue and spending a considerable amount of money, we recommend you go through the below fixes, as these are well researched and can prove to be the ultimate solution to this behavior.
Let’s dive right in.
Contents
Pc Keeps Restarting Before Bios: 5 Causes And Solutions
There can be many reasons for this error, and we describe how to deal with it. As each case varies, the below-mentioned fixes may or may not prove to be the solution for your issue.
We recommend you try the below fixes in any random order.
Check the behavior of your PC if it reacts to any of the solutions, then explore more about it.
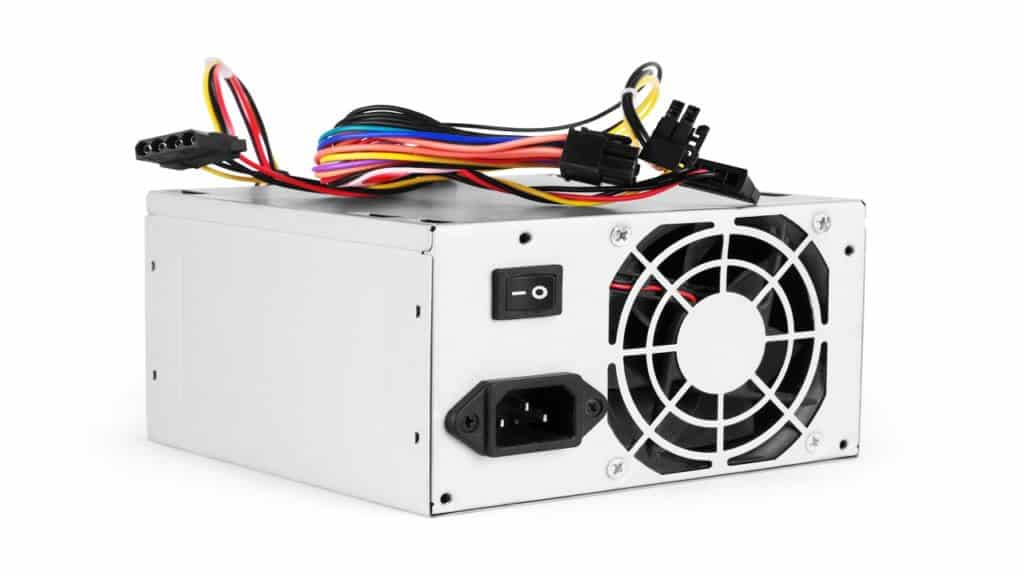
Root Cause 1: Power Supply Issues
The first thing that we recommend checking is your power supply unit, i.e., PSU. Sometimes, everything works well with the computer, and the only issue is the fluctuating power supply.
Yes, an inconsistent supply of power can make your computer restart again and again before BIOS. Let’s try the below fixes.
Fix 1 – Change your Power Supply Unit
Just replace your current power supply unit with another unit of power supply. Always check if the latter one is in good condition and provide the required voltages.
For many people, this fix solves the issue. But if it doesn’t, then, read on to the next solution that’s tested to work.
Fix 2- Recheck the CMOS Battery
Sometimes the issue is in the CMOS battery, and we can just take it out to recheck it.
CMOS stands for Complimentary Metal Oxide Semiconductor, and it converts light signals into electrical signals.
Here are the steps to take in order to solve this issue:
You need to know a few safety measures while taking out the battery. So, when you take out the battery, make sure to keep it outside for at least 15 to 20 minutes.
The purpose of taking out the CMOS battery is to discharge all the electricity stored in the battery. Ensure the power supply unit is turned off before going for this procedure.
Put the CMOS battery inside the PC and turn on your computer.
This will probably solve this problem.
Fix 3- Try your PC with a Switched-Mode Power Supply
Analyzing your PC with a switched-mode power supply can be the best solution for this problem. Ensure that you are using a tested switched-mode power supply that’s in a good condition.
You can google the requirements of your PC to get yourself an excellent working switched-mode power supply.
Root Cause 2: Overheating Issues
If checking your power supply unit doesn’t solve this problem, then overheating can be a possible reason.
If you have kept your PC at an average location where there is no room for ventilation, then the PC components will get heated up as they all emit heat as well.
Overheating may be the leading cause of your restarting issue. Sometimes your PC has an internal problem that causes excessive overheating without any major reason.
This is the most apparent reason if your computer has started restarting suddenly. You can get rid of this error by following these steps.
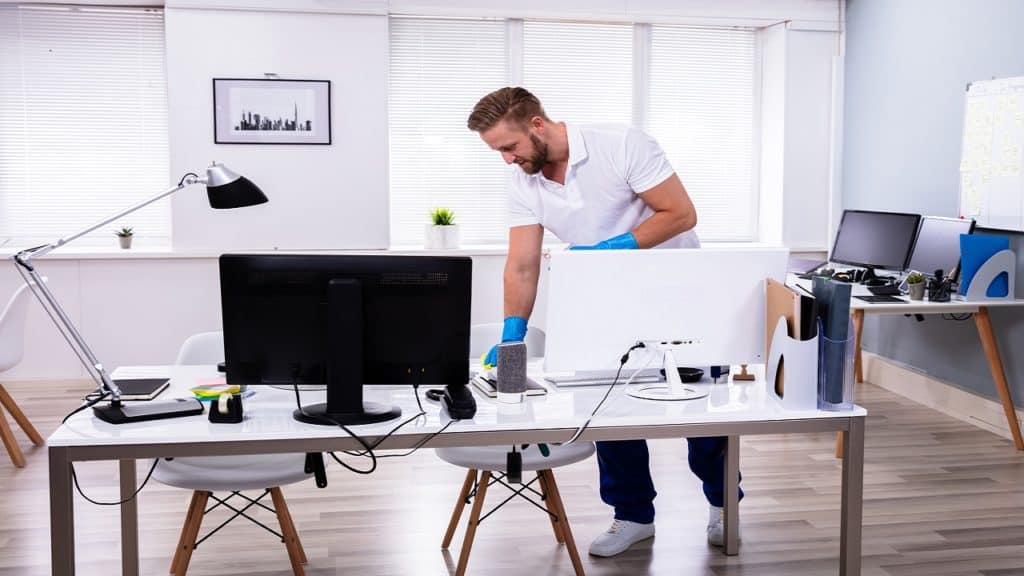
Fix 1- Clean all the Dust
Open your CPU case, take a cleaning towel and clean all the dust. The dust gets clogged with the CPU fan, so always give it more importance while cleaning the CPU.
We recommend you go through this step just as a safety measure. In most cases, this does not cause restarting of the CPU, but rechecking the GPU can make sure that it’s still operational.
Remember, often it’s a faulty hardware component that causes your PC to restart.
Turn on your PC. Restart the PC and check if it works.
Fix 2- Plug the GPU Card in another Slot
Follow the steps below:
Search any unused PSI Express slot and plug your GPU into it.
Turn on your PC and notice the change.
Root Cause 4: Defective Ram
It is possible that the issue is caused by your RAM and is causing your system to restart endlessly. We recommend trying this solution if all the above fixes didn’t work.
Try all the RAM sticks and put them one by one in different slots, and restart your PC.
If it does not work, try another well tested RAM stick in good condition, since all of your RAM sticks may be defective.
Put the new RAM stick and test it by plugging it into any slot.
These steps will ensure that your PC is either restarting because of the RAM or not. If RAM is the reason, just replace it.
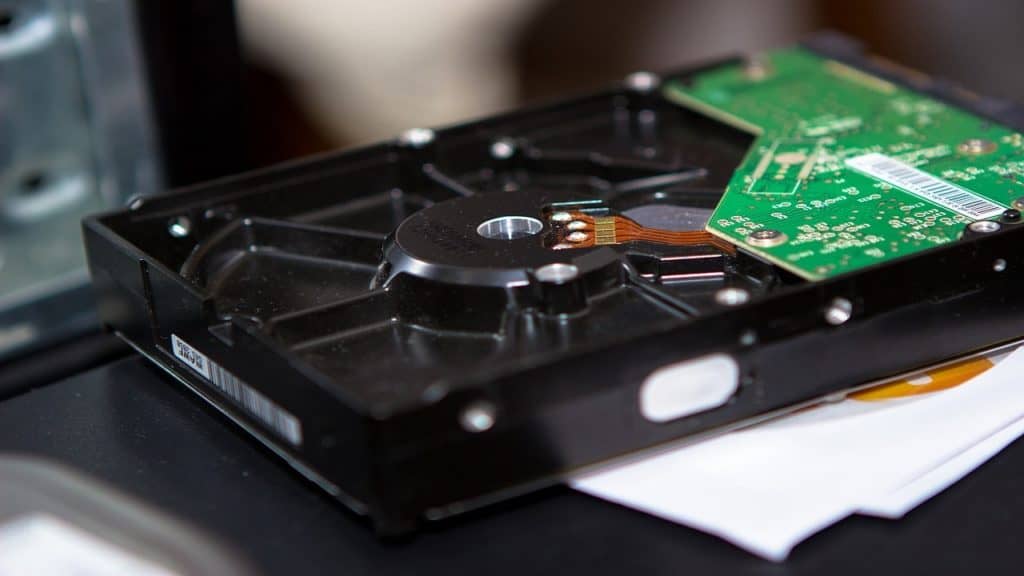
Root Cause 5: Defective HDD/SSD
Remember, all the SSD and Hard Disk Drives that you associate with your PC have nothing to do with the booting procedure.
Fix 1- Remove all the Drives
Just take all the SSDs/HDDs out of your CPU case and restart your PC. This can work in some cases.
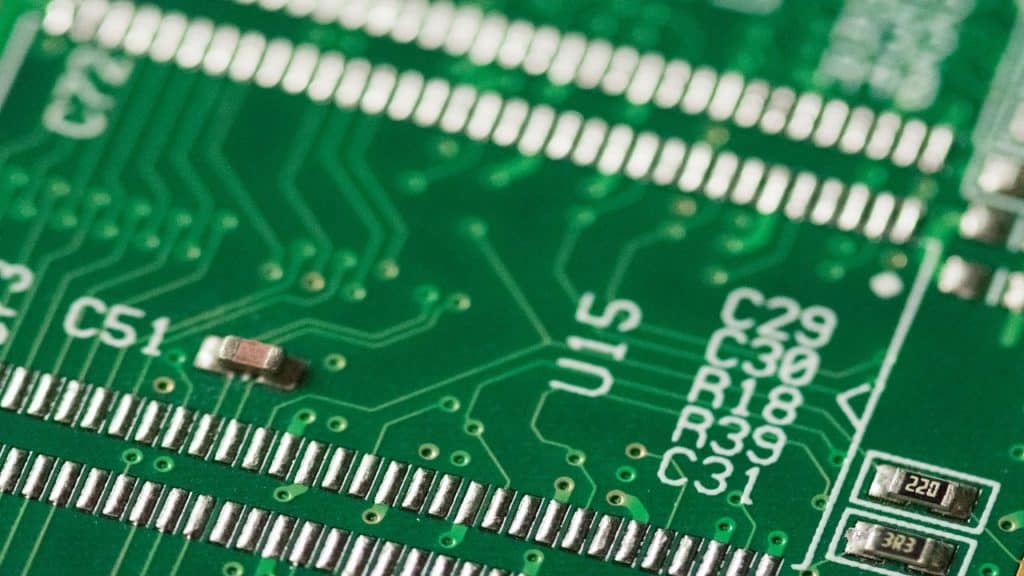
An Optional Check: Defective Motherboard
Sometimes, the restarting issue doesn’t occur because of the RAM, GPU, power supply unit, and overheating, but the root cause is only a pin in your motherboard.
We found out that fixing it can solve the error. And that leads us to fix 2.
You can also run a system stress test using an appropriate tool. Read our guide on “How Long To Run Prime95″ for more info.
Check every nook of the motherboard if all the pins are straight and no one feels slightly bent.
If you feel that some pin is slightly bent, try to straighten it up with your finger, but not exert any pressure.
Turn on your PC and see if the situation changes.
This fix needs great care since any broken pin can make you lose the motherboard, and you will have to spend more money to solve an additional issues.
Fix 3- Remove your Motherboard
Removing your motherboard can ensure if the problem is in the motherboard or not.
Take out your motherboard from the CPU case.
Place the motherboard aside and start your PC.
See if you notice any change in the situation. If the PC starts, you have to go buy a new motherboard.
We have explained the major fixes that can solve your problem. But if nothing works, then that means you have to contact a local technician who can see the issue and fix it for you.
PC Keeps Restarting Before Windows Loads: What To Do?
If your system is restarting even before Windows loads, then it’s time to fix the problem.
These issues may occur for many reasons, and it sometimes occurs due to errors in the hard drive.
Let’s discuss the reasons and their possible fixes below.
Fix 1- Test the Hard Drive
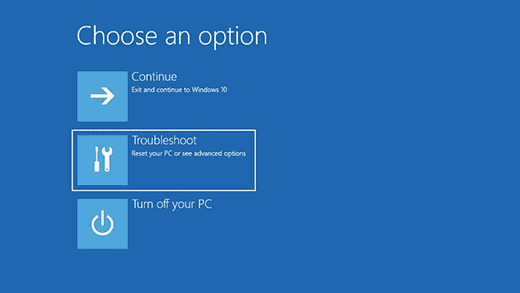
Sometimes the hard drive has a major flaw. To test your hard drive, just reboot the system. Hold on to the “F8” key until you see a “Windows Recovery” screen.
You will see a “Troubleshoot” option. Click on this button and open CMD.
When the CMD window appears, run the following command “chkdsk c: /f /r” and hit the enter button.
If there is any defective sector or hardware error in your PC, then this command will solve it for you. Now start your PC and see the change.
Fix 2- Time to Scan all the files
Go through the above procedure till you open the cmd. This time replace the above command with this one “SFC /scannow.” Hit the enter button.
This command will do a thorough scanning, checking all through the files.
Check out the video below on how to run the command properly:
This scanning will include a DLL scanning, which will show the errors as a result.
The by-default action of this command is that it changes all the files having errors with the cache files. Now restart your PC. Crossing fingers that our issue is now solved!
Fix 3: Disable the Auto-Restart Feature
Sometimes, the issue just occurs because the ‘Auto-Restart” feature is enabled on your PC. To disable it, just reboot the system and press the F8 key.
This will open the Boot window of your PC. Try to reboot your PC in a Safe Mode.
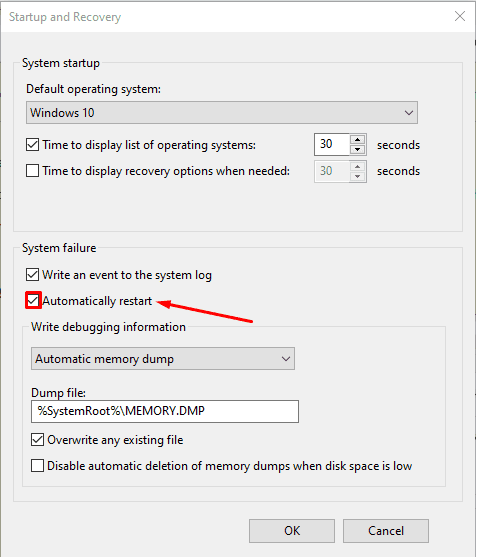
Now open the Run command by pressing the Windows key with R. Type “sysdm.cpI” and press the “enter” key.
You will see a “System Properties” screen in front of your screen, and just go to the “Advanced” tab.
You will find an option of “Automatic Restart” and save the settings.
Fix 4- Reset your PC
This fix can bring your PC to its original settings and can probably fix this error. Just open the settings of your PC, find the option of “Update & Security,” and hit the “Recovery” button.
This will get you started with resetting your PC. You will see some steps to either keep some files or delete some data. Just choose it carefully.
Now restart your PC and see if it works.
Fix 5-Do an Automatic Repair
You can purchase a Windows Bootable DVD/CD, just put it in the drive of your PC and reboot your system.
This step will take some time but will help scan and repair your corrupted Windows files. Restart, and this will probably work for you.
I found that this step solves the problem in 9 out of 10 cases.
5 Tips For Preventing Future Complications
We recommend you take care of your PC by following these steps instead of hiring an expert after every month to get these minor issues fixed for you.
Keep the “Automatic Restart” feature disabled on your PC.
Put the “Fast Startup” feature turned off on your PC.
Keep a check on your latest installed applications on your PC. They might be the reason for a sudden change in your PC’s performance.
Do not go for every Windows Update.
Keep on updating your system drivers.
Frequently Asked Questions
Can BIOS Cause Reboots?
Yes, BIOS can cause reboots. This happens when the fan stops spinning. You can go through the fixes which can solve this error for you.
Why Does My PC Keep Restarting After BIOS?
It happens primarily because of the error in the power supply unit. You can remove the CMOS and replace it. Just take this CMOS out of your PC for 15 to 20 minutes, and then put it back and restart the PC. Notice the change.
Why Is The PC Restarting Automatically?
PC restarting errors can occur because of many reasons. We will recommend you check for the following issues: 1. Error in Power Supply unit 2. Defective GPU 3. Defective RAM 4. Faulty Motherboard 5. Overheating
How To Enter BIOS When Restarting The Computer?
Just follow the two easy steps and enter the BIOS. Did you know you can also change CPU frequency in BIOS? While the PC is restarting, press either the F1 key or the F2 key, and you will see yourself in BIOS.
Why Does My PC Keep Going Into BIOS?
In most cases, this problem occurs due to the incorrect boot order, leading you to boot to the BIOS repeatedly. Try to find an appropriate boot device appearing on your BIOS. Now set it to your primary boot device and start the PC. Sometimes the disk gets unplugged from its place, and make sure to check that as well.
We use cookies on our website to give you the most relevant experience by remembering your preferences and repeat visits. By clicking “Accept”, you consent to the use of ALL the cookies.
This website uses cookies to improve your experience while you navigate through the website. Out of these, the cookies that are categorized as necessary are stored on your browser as they are essential for the working of basic functionalities of the website. We also use third-party cookies that help us analyze and understand how you use this website. These cookies will be stored in your browser only with your consent. You also have the option to opt-out of these cookies. But opting out of some of these cookies may affect your browsing experience.
Necessary cookies are absolutely essential for the website to function properly. These cookies ensure basic functionalities and security features of the website, anonymously.
Cookie
Duration
Description
cookielawinfo-checkbox-analytics
11 months
This cookie is set by GDPR Cookie Consent plugin. The cookie is used to store the user consent for the cookies in the category "Analytics".
cookielawinfo-checkbox-functional
11 months
The cookie is set by GDPR cookie consent to record the user consent for the cookies in the category "Functional".
cookielawinfo-checkbox-necessary
11 months
This cookie is set by GDPR Cookie Consent plugin. The cookies is used to store the user consent for the cookies in the category "Necessary".
cookielawinfo-checkbox-others
11 months
This cookie is set by GDPR Cookie Consent plugin. The cookie is used to store the user consent for the cookies in the category "Other.
cookielawinfo-checkbox-performance
11 months
This cookie is set by GDPR Cookie Consent plugin. The cookie is used to store the user consent for the cookies in the category "Performance".
viewed_cookie_policy
11 months
The cookie is set by the GDPR Cookie Consent plugin and is used to store whether or not user has consented to the use of cookies. It does not store any personal data.
Functional cookies help to perform certain functionalities like sharing the content of the website on social media platforms, collect feedbacks, and other third-party features.
Performance cookies are used to understand and analyze the key performance indexes of the website which helps in delivering a better user experience for the visitors.
Analytical cookies are used to understand how visitors interact with the website. These cookies help provide information on metrics the number of visitors, bounce rate, traffic source, etc.
Advertisement cookies are used to provide visitors with relevant ads and marketing campaigns. These cookies track visitors across websites and collect information to provide customized ads.


![Best Mousepad For High DPI [7 Amazing Picks Reviewed]](data:image/svg+xml,%3Csvg%20xmlns='http://www.w3.org/2000/svg'%20viewBox='0%200%20150%20150'%3E%3C/svg%3E "Best Mousepad For High DPI [7 Amazing Picks Reviewed]")
")
![Best Mousepad For High DPI [7 Amazing Picks Reviewed]](https://maximum-tech.net/wp-content/uploads/2022/02/best-mousepad-for-high-dpi-150x150.jpg "Best Mousepad For High DPI [7 Amazing Picks Reviewed]")
![Best CPU For Programming In 2022 [7 Picks For Every Budget]](https://maximum-tech.net/wp-content/uploads/2022/02/best-cpu-for-programming-150x150.jpg "Best CPU For Programming In 2022 [7 Picks For Every Budget]")
![How To Change CPU Fan Speed Without Bios? [Easy Guide]](https://maximum-tech.net/wp-content/uploads/2022/05/How-To-Change-CPU-Fan-Speed-Without-Bios-150x150.jpg "How To Change CPU Fan Speed Without Bios? [Easy Guide]")
![Best CPU for Minecraft In 2022 [7 Worthy Picks Reviewed]](https://maximum-tech.net/wp-content/uploads/2022/04/best-cpu-for-minecraft-150x150.jpg "Best CPU for Minecraft In 2022 [7 Worthy Picks Reviewed]")
![How To Know If CPU Is Dead? [A Comprehensive Guide 2022]](https://maximum-tech.net/wp-content/uploads/2022/04/How-To-Know-If-CPU-Is-Dead-150x150.jpg "How To Know If CPU Is Dead? [A Comprehensive Guide 2022]")
")