Maximum-Tech.net is reader-supported. When you buy something through links on our site, we may earn an affiliate commission. As an Amazon Associate, I earn from qualifying purchases
Let’s say you have just unpacked and installed your new motherboard on your computer.
What to do after installing a new motherboard? What are the best practices and how to overcome basic errors and problems after the motherboard installation process?
Having similar questions in mind or facing an issue? Don’t worry we’ve answered all such questions in our comprehensive guide just for you. We know how hard it can be when it comes to figuring out all solutions by yourself.
This article will guide you properly about things you need to do after installing a new motherboard.
So, without any further ado, let’s get started.
Contents
What To Do After Installing A New Motherboard?
Installing your new motherboard on the computer should give you the first sense of accomplishment.
However, once you have installed you need to learn some best practices to keep the newly installed device up and running for a long time so that you can enjoy endless gaming sessions and have fun.
An important check to have, for example, is to pay attention to compatibility. For instance, that means not to install your Intel CPU on an AMD motherboard.
Here are a few other things you need to do right after the installation of the motherboard.
Putting The Hardware Back In
In most cases, you have to put back all your old hardware after installing the new motherboard. So, make sure all devices are in the exact same location where they were before when you took them out. The following components need to be placed carefully in their respective slots.
Installing the CPU
Ensure that you have installed the CPU properly on your motherboard.
You can use a plastic protective cover to avoid any kind of damages during the installation. If you are having an aftermarket cooler, then better take help from the manual provided with it to install it properly.
When it comes to installing your processor, you will have to open your processor socket by flipping the arrow locks. Once you are done, align the triangle sign on your CPU with the triangle mark on the motherboard and gently put it inside.
After that, lock down the socket head making sure that all pins are in place. Don’t force it, just make sure everything is in its proper place.
You can easily install your memory sticks by putting them into the DIMM slot. Remember, you have installed it in a proper direction because this might cause problems while booting up.
Inserting it is fairly simple but if there are extra power connectors then make sure you plug them in properly as they can be really hard to connect later on (I know from my personal experience). You should also refer manufacturer’s manual for installing as it is pretty straightforward.
Installing The Power Supply (PSU)
Before connecting anything, you should keep in mind that PSU should be installed only after all the components are safely seated inside their respective slots.
Now the cables can be connected for powering your graphic card/s and other units.
There will be at least two cables (one is 24-pin and the other one will be 12-pin) you need to connect with your power supply.
Speaking of the power supply, have you checked our guide on“what is vid voltage”? if not then we highly recommend reading that too right after when you are done here.
Connecting Case Front I/O Ports and Fan Headers
If you have installed an aftermarket cooler, then you might have a fan controller unit. That unit can be plugged in at your motherboard end.
All the wires will be routed from your cooler and motherboard end.
But if not, then you have to connect it with the front panel headers on your motherboard.
Connecting The Front Panel Controllers
The case connected to your motherboard should have a power button as well as a reset button with other indicators such as disk activity/HDD light and power light. These buttons need to be connected with the motherboard in order for it to work.
Connecting The Power Button/Indicator to Your Motherboard
All these cables are connected using a four or three-pin connector and it should be configured properly according to your motherboard wiring type.
You can refer your motherboard manual for this as every motherboard uses a different kind of wiring configuration.
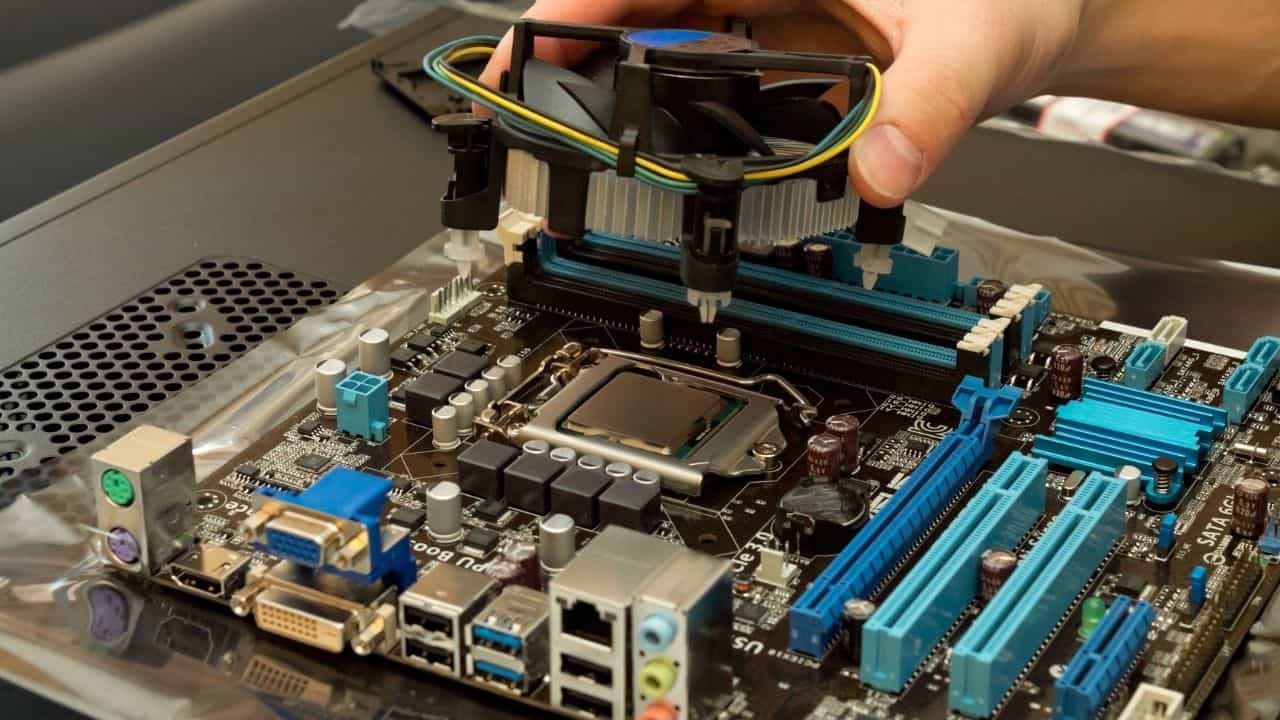
Installing A Processor Fan or Heatsink
By now you know how to install your motherboard and connect all the necessary hardware components required for having a good gaming experience. All that’s left to do is installing your processor cooling unit like a fan or heatsink. It can be done using push pins or screws.
Installing A Fan/Heatsink Using Push Pins
If you have a fan, then you won’t need to connect it with any wire as it will be directly powered up by the power supply unit. You just have to connect it through the 4 or 3 pin connectors according to your wire configuration and attach using push pins or screws.
Reinstalling The Windows Operating System
This step is not necessary for the majority of the cases. It is because installing new motherboard and CPU with old hard drive will probably not affect the data. However, in some cases, you will need to do a fresh install.
Don’t worry, we will teach you how to do it properly and avoid common pitfalls during the installation process.
Legacy BIOS/MBR
If you are using Legacy BIOS/MBR (current), then you need to format your computer with FAT32 before installing the Windows 10 operating system. To do this, you’ll need to create two partitions on your hard drive: one for booting and another for data storage. After that, you’ll need to format the partition where you want to install your new operating system with FAT32 and install the Windows on another partition.
UEFI/GPT
If you are using UEFI/GPT (new), then you don’t need to worry about formatting your hard drive with FAT32 before installing an operating system.
When you’re performing a fresh installation of Windows, go to “advanced” options and format the partition where you want to install your operating system.
After that just follow the instruction mentioned on the screen and you will be good to go. We highly recommend connecting your computer to a cloud account as soon as possible in order to avoid loss of data.
The Bios Updating
BIOS is a built-in software used for the setup of your motherboard and system components. It contains information about your devices connected to it such as processors, audio cards, graphic cards, HDDs, etc.
Every manufacturer releases new drivers in order to support new components and fix bugs.
And always working with the newest drivers is necessary. Otherwise you can encounter various issues including your MSI afterburner clock not changing.
Bios Upgrade Process
Updating BIOS can be a little difficult and risky if you do it without knowing what you’re doing. We will guide you on how to properly perform this process.
Firstly, visit the official website of your motherboard manufacturer (e.g.: Asus, MSI, Gigabyte, etc.) to download the latest motherboard driver. Make sure that your motherboard model is supported or else it may damage your motherboard.
Download the file and extract it on a flash drive you will be using for updating BIOS. Note: NEVER try to update BIOS through the USB port on your PC as it may damage the components connected with your motherboard.
Now, turn off your computer by pressing the power button and then make sure that no devices are plugged in except the keyboard and mouse. Press and hold the Delete key on the keyboard to enter the BIOS menu.
Now, go to the “Advanced” tab and select “USB BIOS Flashback”. Now press F5/F6 in order to activate the USB port according to the BIOS version you are using. After following these steps properly, your motherboard will now automatically detect your flash drive and install the latest BIOS version.
After you are done, don’t forget to press F10 and save all settings before restarting your system as this will avoid problems during the boot process.
For more detailed instructions on how to properly update your motherboard’s BIOS, please visit the official website of your motherboard manufacturer. You can also take help from YouTube video tutorials available online.
The Driver Setup
The next step is to install all the necessary drivers for each component on your PC. Just follow these instructions to properly install drivers for each component.
Step 1 – First of all, make sure that you have already downloaded the latest drivers for your respective components. Drivers can be found easily on the manufacturer’s official website (e.g.: Asus, MSI, Acer, Lenovo, etc.).
Make sure that you download the correct driver for your motherboard, graphic cards, sound card, network adapter, and whatever other components you have connected to your computer.
Step 2 – Now insert the driver installation disk that came with the motherboard or download it from the official website of your respective manufacturer. Your PC will automatically detect it and install all drivers on your own.
Step 3 – If you downloaded drivers from the official website then extract the file and run the .exe file to start installing them.
Follow any on-screen instructions in order to complete the installation process.
After you are done with steps 2 and 3, just restart your computer for proper installation of new drivers.
What Can Go Wrong with A Newly Installed Motherboard
Since you have just installed a new motherboard on your computer, there is a possibility that some components may not work properly.
In some cases, you will face the computer not booting up after replacing the motherboard. However, you shouldn’t worry about anything at all.
This can happen either because of a driver issue or the new BIOS version. So, here are a few things which you should check for if something goes wrong:
Ensure that all power cables are plugged in properly and are not damaged.
Make sure that all SATA ports are correctly aligned in order to avoid any future problems.
Check for the latest BIOS update for your motherboard and if it is available then follow our guide on how to update BIOS step by step.
You should check the manufacturer’s website for any latest updates on the BIOS version you are using. If there is any update then first uninstall the old driver software and install it again according to the latest version.
You should also check for compatibility issues if you are running your old drivers or OS in order to avoid any issues with new hardware components connected to your computer.
Last but not least, don’t forget to clean your motherboard from time to time. You can use wd40 for that.
Frequently Asked Questions
If I replace my motherboard, will I lose my data?
No data is lost during the motherboard replacement process. It is because data is generally stored on solid-state drives or standard HDDs which is an isolated platform and it hasn’t anything to do with motherboard switching.
What to know when replacing a motherboard?
Wen replacing your motherboard, you need to know the full installation process along with the basic best practices (which we’ve mentioned already in our guide). You need to make sure that you have placed all the components and they are working fine.
Do you have to reinstall OS when changing motherboard?
Well, absolutely not because the windows operating system is installed on your hard drive and will probably not be affected by the motherboard installation process. However, in some cases, things can go in a different way but that is 10 out of 100 cases.
Conclusion
Most people are confused and start thinking about what do I do when I get a new motherboard. Well, we have mentioned some of the best practices that you need to follow to learn how to setup new motherboard.
I hope this article was useful for you in installing your new motherboard and other hardware components without any issues. If you are facing any problems, just let us know through the comments section below.
One last thing, if you have installed a fan/heatsink then it’s time to do some overclocking! Also, don’t forget to share your experience with us and your fellow readers in the comments section below. Happy Overclocking!
We use cookies on our website to give you the most relevant experience by remembering your preferences and repeat visits. By clicking “Accept”, you consent to the use of ALL the cookies.
This website uses cookies to improve your experience while you navigate through the website. Out of these, the cookies that are categorized as necessary are stored on your browser as they are essential for the working of basic functionalities of the website. We also use third-party cookies that help us analyze and understand how you use this website. These cookies will be stored in your browser only with your consent. You also have the option to opt-out of these cookies. But opting out of some of these cookies may affect your browsing experience.
Necessary cookies are absolutely essential for the website to function properly. These cookies ensure basic functionalities and security features of the website, anonymously.
Cookie
Duration
Description
cookielawinfo-checkbox-analytics
11 months
This cookie is set by GDPR Cookie Consent plugin. The cookie is used to store the user consent for the cookies in the category "Analytics".
cookielawinfo-checkbox-functional
11 months
The cookie is set by GDPR cookie consent to record the user consent for the cookies in the category "Functional".
cookielawinfo-checkbox-necessary
11 months
This cookie is set by GDPR Cookie Consent plugin. The cookies is used to store the user consent for the cookies in the category "Necessary".
cookielawinfo-checkbox-others
11 months
This cookie is set by GDPR Cookie Consent plugin. The cookie is used to store the user consent for the cookies in the category "Other.
cookielawinfo-checkbox-performance
11 months
This cookie is set by GDPR Cookie Consent plugin. The cookie is used to store the user consent for the cookies in the category "Performance".
viewed_cookie_policy
11 months
The cookie is set by the GDPR Cookie Consent plugin and is used to store whether or not user has consented to the use of cookies. It does not store any personal data.
Functional cookies help to perform certain functionalities like sharing the content of the website on social media platforms, collect feedbacks, and other third-party features.
Performance cookies are used to understand and analyze the key performance indexes of the website which helps in delivering a better user experience for the visitors.
Analytical cookies are used to understand how visitors interact with the website. These cookies help provide information on metrics the number of visitors, bounce rate, traffic source, etc.
Advertisement cookies are used to provide visitors with relevant ads and marketing campaigns. These cookies track visitors across websites and collect information to provide customized ads.

![Best CPU For Programming In 2022 [7 Picks For Every Budget]](data:image/svg+xml,%3Csvg%20xmlns='http://www.w3.org/2000/svg'%20viewBox='0%200%20150%20150'%3E%3C/svg%3E "Best CPU For Programming In 2022 [7 Picks For Every Budget]")
")
![Best CPU For Programming In 2022 [7 Picks For Every Budget]](https://maximum-tech.net/wp-content/uploads/2022/02/best-cpu-for-programming-150x150.jpg "Best CPU For Programming In 2022 [7 Picks For Every Budget]")
![Best Mousepad For High DPI [7 Amazing Picks Reviewed]](https://maximum-tech.net/wp-content/uploads/2022/02/best-mousepad-for-high-dpi-150x150.jpg "Best Mousepad For High DPI [7 Amazing Picks Reviewed]")
![How To Change CPU Fan Speed Without Bios? [Easy Guide]](https://maximum-tech.net/wp-content/uploads/2022/05/How-To-Change-CPU-Fan-Speed-Without-Bios-150x150.jpg "How To Change CPU Fan Speed Without Bios? [Easy Guide]")
![How To Know If CPU Is Dead? [A Comprehensive Guide 2022]](https://maximum-tech.net/wp-content/uploads/2022/04/How-To-Know-If-CPU-Is-Dead-150x150.jpg "How To Know If CPU Is Dead? [A Comprehensive Guide 2022]")
![Best CPU for Minecraft In 2022 [7 Worthy Picks Reviewed]](https://maximum-tech.net/wp-content/uploads/2022/04/best-cpu-for-minecraft-150x150.jpg "Best CPU for Minecraft In 2022 [7 Worthy Picks Reviewed]")
")