Maximum-Tech.net is reader-supported. When you buy something through links on our site, we may earn an affiliate commission. As an Amazon Associate, I earn from qualifying purchases
M.2 Drive Not Showing Up In BIOS: 3 Super-Easy Fixes [2022]
If you are using M.2 drive and the drive is not showing up in BIOS, then we are here to help you resolve this error.
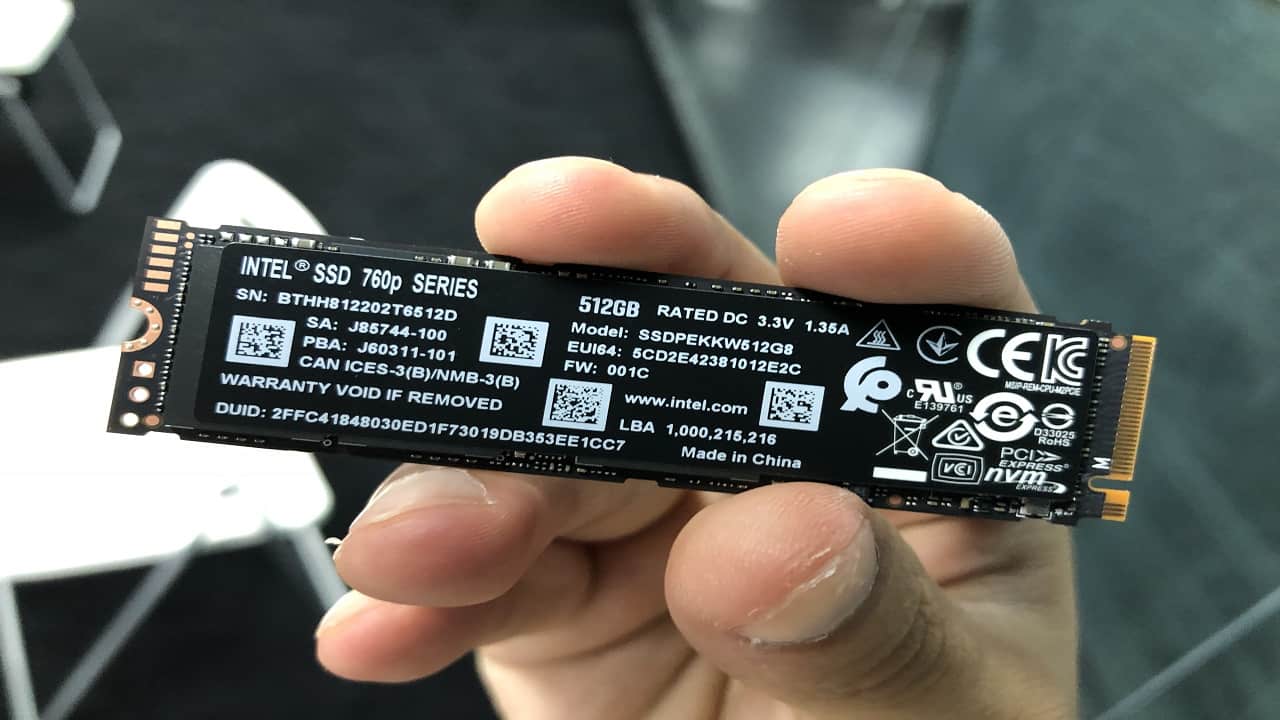
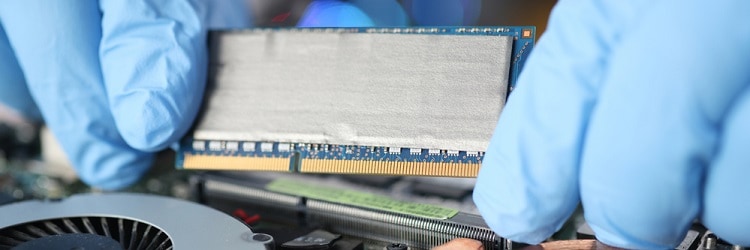
These days, M.2 drives are used to enhance performance, but this benefit comes with a few issues.
We will discuss all these issues and how you can prevent them from occurring.
In addition, the problem of the M.2 drive not showing up in BIOS on ASUS and ASRock, can occur for many reasons. We will discuss each reason in detail, as well as possible fixes that worked for me.
Let’s dive into it.
Contents
M.2 Drive Not Showing Up In BIOS: 3 Causes & Solutions
There are many reasons why the M.2 drive may not show up in BIOS.
It may be because the SSD driver is missing, the disk management is not detecting it, or the motherboard does not support it.
Let’s discuss the most likely reasons and their solutions to address this error.
#1 Windows Isn’t Picking Up the Drive
Sometimes, this problem occurs not because of the BIOS, but due to the Windows operating system.
This is when you need to check your Windows for a possible solution.
Let’s check Windows and plan a solution.
Check the SSD Driver
This problem may occur if the SSD drive is not properly installed on Windows. The probability of this issue is rare if you are using a new Windows system.
In most cases, this problem occurs while using an old version of Windows.
PCIe NVMe M.2 SSD is mostly left undetected in Windows 7 or 8. So, if you are using an older version of Windows, you need to install the PCIe NVMe M.2 SSD manually.
It is very easy to download – just visit the website of its creator and click the Download button.
So what are the suggested fixes?
Put your installed M.2 SSD Driver on Update
Hold the Windows button and press X. Then tap on Device Manager.
Click the Expand button to see the information about SSD Disk Drives on the screen.
Search for the M.2 SSD button on the screen and right-click on it. Click the Update Driver Software option.
If you do not want to search for the updated version of the M.2 SSD driver, then just click on Search automatically for updated driver software. You will see it searching for an updated version itself.
Wait until the update is complete. Restart your system and see if it works.
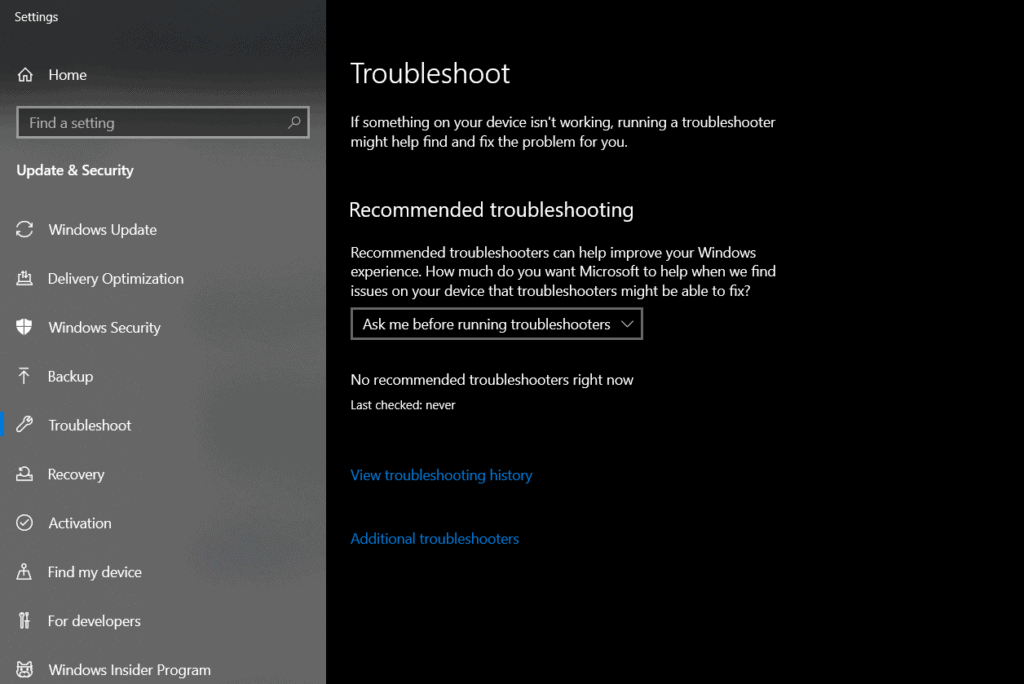
Use Hardware and Device Troubleshooter
Click the Search button and open the search window, type “Hardware and Devices Troubleshooter,” and search to get started.
Hit the Next button and wait until it completes a thorough scanning. Click Next and wait for scanning.
This will solve many errors in your system. Just check to see if it works for this error too.
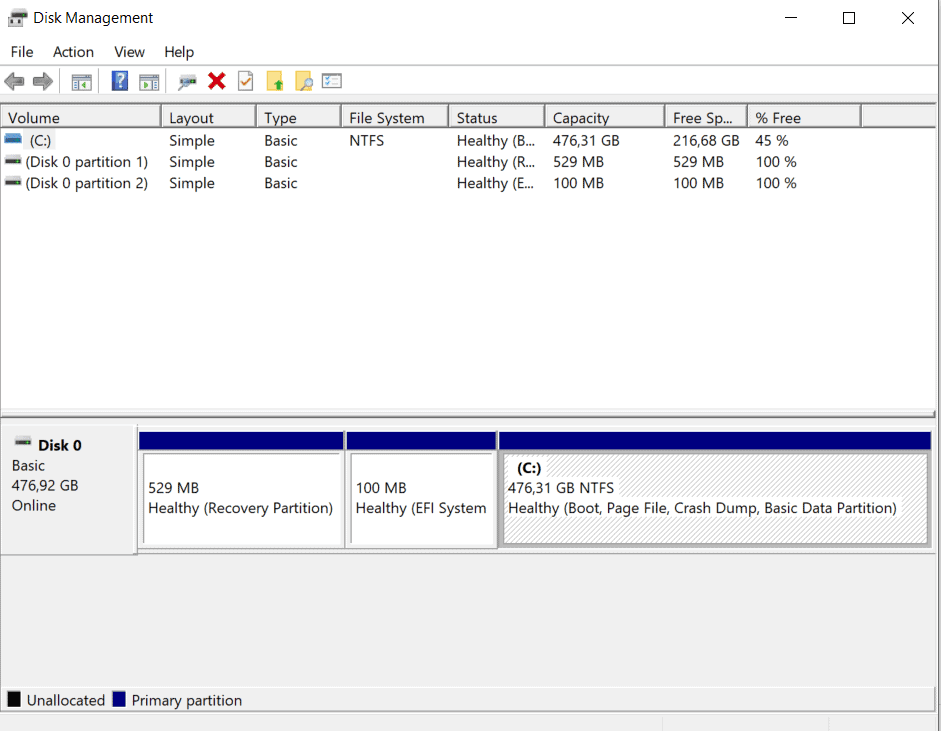
Try Assigning a Drive Letter
Click the Search button on the bottom of your screen and choose the Disk Management option.
Search your SSD, right-click on it, and click on Change Drive Letter and Paths. Now check to see if it helps in solving your error.
Once you are sure enough that the BIOS is not the root cause of this error, it’s time to check if your Windows is responsible or not.
Switch to the Latest Version of Windows
There is no need to download the M.2 SSD driver if you are using Windows 10 or 11, as it is already downloaded in these newer versions.
Many people still face the same error even after installing the SSD driver. This means you need to update your Windows or switch to the latest version of Windows.
The latest Windows comes with the latest versions of M.2 SSDs. If you have tried installing an SSD driver in your Windows too, but the error still stays the same, then consider updating your Windows.
There is a good chance that you will get rid of this error using this method.
This way, you can solve the error of the M.2 drive not showing up in Windows 10 install.
Update BIOS
Always check to make sure you are using the latest version of BIOS, as the previous versions do not support M.2 SSDs, resulting in this error.
Always do a little research before updating the BIOS, as it is a bit of a risky method, especially for beginners.
Go to the settings and search M.2 and SATA Express Mode Configuration.
Make sure it is set to M.2. In most cases, this setting is set to Auto.
Always do a little research about your motherboard before changing this setting, as it varies depending on what you have.
Check by disabling the Secure Boot button in the BIOS settings. That may result in solving your problem, too. This will solve the error of the M.2 not showing up in BIOS boot priority.
To solve the error of the M.2 drive not showing up in BIOS gigabyte, just disable RAID from BIOS.
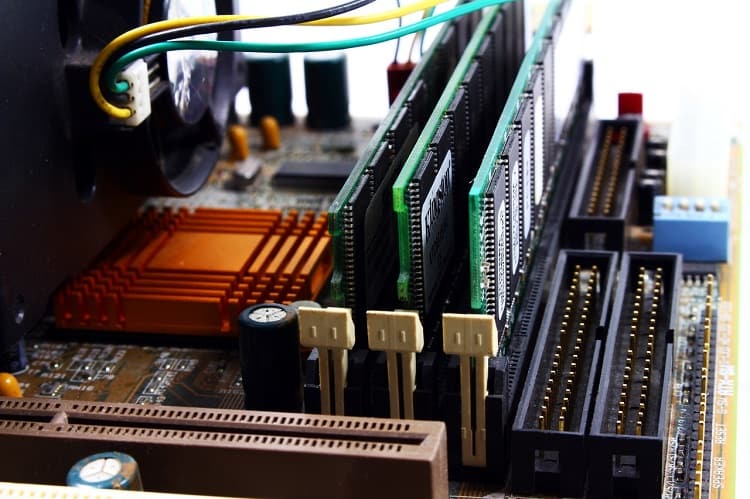
#2 Drive Plugged Into the Wrong Slot
Some people think that this problem occurs when the M.2 SSD drive is plugged into a slot of another drive. That’s not right.
You can plug your M.2 SSD drive in any slot that has two keys; it does not matter if the slot is actually an M.2 SSD or not.
Sometimes, you may encounter a situation where a slot supports both NVMe and M.2 SSD drives.
Here are the suggested fixes:
If you have a slot for NVMe and you plug an M.2 SSD drive into it, then the system will simply ignore it. Nothing will happen in this case.
If you try to plug NVMe into M.2 slots that are compatible with SATA, then you would not be able to use it. This is because NVMe has only one key and you can’t fit it.
#3 The Motherboard Doesn’t Support NVMe Booting
To check if your motherboard supports NVMe booting, let’s go through the following steps.
Find the model number and the company name written on the motherboard.
Type this information into your Google search bar and see what you get. You will surely get the required information about whether your motherboard supports NVMe or not. This is because every manufacturer uploads an electronic copy of the motherboard on the internet, and there you can see the specifications indicating if it supports NVMe or not.
There is hardly any motherboard whose specifications are not found on the internet, unless you’ve had a custom-made motherboard.
If your motherboard information states that it is compatible with the NVMe slot, then that does not mean that your motherboard has M.2 slots as well. In most cases, M.2 slots come with NVMe support, but this is not always guaranteed. It is possible that it only supports SATA in its slots.
5 Expert Tips For Preventing Future Complications
In this era, everyone wants to have the fastest drive in their system; for that, they choose M.2 NVMe PCIs SSD drives.
No doubt these drives come with a considerable performance increase, but many people face overheating problems as a result.
These problems are real, so let’s discuss what you can do to prevent future complications with these drives.
#1 Make Regular Backups
Whatever SSD drives you are using, you should always think about having a good backup solution. It is an essential and important part of your work routine.
You might have heard about how reliable SSD drives are, but still there are many errors associated with them.
Just remember one thing: every SSD drive can fail at any time. That’s why I always make a backup every few months.
#2 Never Store Important Data on M.2 Drives
If you do not make backups or have not found a better idea for a good backup solution, then we recommend you never store important data on your M.2 drive.
Just get yourself a few different kinds of storage devices on which to store critical data. This will surely put you on a safer side.
There may be some drives that you can use for storing your critical data , but always remember that these devices are also prone to electrical power failures that can force you to spend millions to get your data back.
#3 Don’t Use The Wrong SSD
Sometimes, the SSD you are using cannot hold the workload that you are providing it. In other words, it has less capacity than that you need, which is known as misusing an SSD.
It is always possible to predict the right amount of storage you need. In this way, you can easily prevent this problem from occurring.
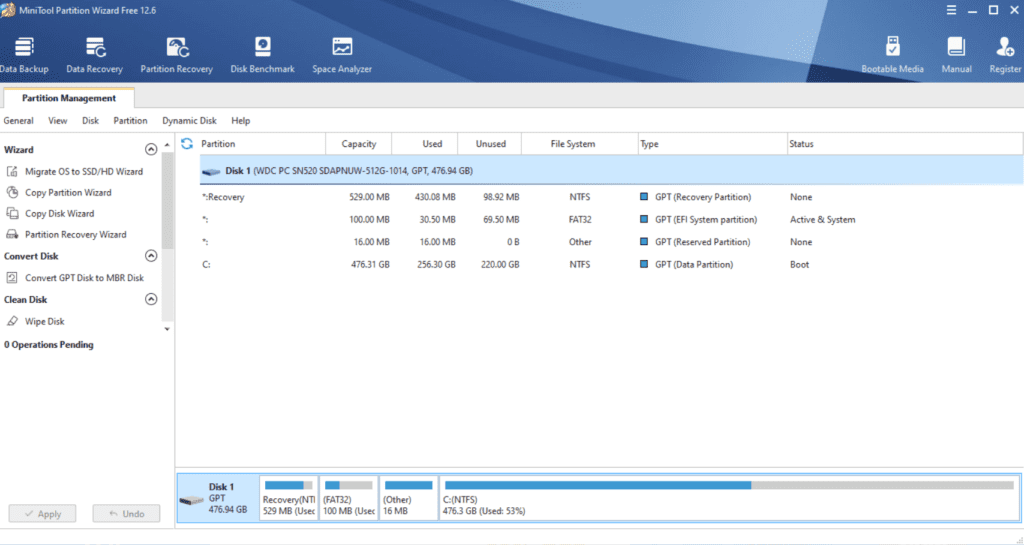
#4 Monitor Drive Health
Keep in mind, you might not see any apparent problems with your SSD, but it may have a serious problem inside.
You can use any hardware monitoring software that can detect inner problems. That’s important to get rid of any unwanted errors.
A great free tool that I use is Mini Tool Partition Wizard.
#5 Avoid Defragmentation
Never try to defrag your SSD, as it can cause serious performance problems and reduce the lifespan of your SSD.
SSD has a default functionality to read data from any location, whether they are present in a random manner or just contiguous.
FAQ
How do I enable M.2 SSD in BIOS?
You can enable M.2 SSD in BIOS by following these steps: 1. Turn your system on and press the F12 key. Hold this key until it shows you UEFI BIOS. 2. Just hit the Advanced tab, then click Onboard Device Configuration. 3. You will get M.2. socket information. Just turn it on so that it is enabled. 4. Save these settings and exit from BIOS.
How do I get my M.2 Drive to show up?
You can use many methods to make it work for you. Let’s describe a few of these. 1. Check the SSD driver. 2. Update Windows. 3. Update BIOS (though research it first, as it is somewhat risky). 4. Check your motherboard to determine if it is compatible with it or not.
How do I know if M.2 is SATA or NVMe?
Check the form factor. If it is 2.5, then the M.2 that you have is not NVMe. If the form factor is M.2, but is not listed with the PCI slot list, then it means your drive can be a NVMe or SATA drive. Now check the speed value to decide which of the two it is.
Why is my boot drive not showing up in BIOS?
Sometimes manufacturers just turn off some drives; that’s why they do not show up in BIOS. These drives are turned off just because they are unused. Just go to the BIOS settings and turn them on.
How do I fix BIOS not detecting hard drives?
You can fix this issue by just following the below steps: 1. Restart your PC and enter into BIOS settings by pressing F12. 2. Go to the system configurations and turn on the hard drive. 3. Click on the auto-detection feature so that you do not have to turn it on manually next time. 4. Reboot and check to see if it now detects the hard drive or not.
Final Words
We have explained several steps through which you can get these issues resolved. Before following all the steps clearly, do a little research so that you know all about your system and your motherboard.
This will help you a lot in getting your desired outcomes.
We use cookies on our website to give you the most relevant experience by remembering your preferences and repeat visits. By clicking “Accept”, you consent to the use of ALL the cookies.
This website uses cookies to improve your experience while you navigate through the website. Out of these, the cookies that are categorized as necessary are stored on your browser as they are essential for the working of basic functionalities of the website. We also use third-party cookies that help us analyze and understand how you use this website. These cookies will be stored in your browser only with your consent. You also have the option to opt-out of these cookies. But opting out of some of these cookies may affect your browsing experience.
Necessary cookies are absolutely essential for the website to function properly. These cookies ensure basic functionalities and security features of the website, anonymously.
Cookie
Duration
Description
cookielawinfo-checkbox-analytics
11 months
This cookie is set by GDPR Cookie Consent plugin. The cookie is used to store the user consent for the cookies in the category "Analytics".
cookielawinfo-checkbox-functional
11 months
The cookie is set by GDPR cookie consent to record the user consent for the cookies in the category "Functional".
cookielawinfo-checkbox-necessary
11 months
This cookie is set by GDPR Cookie Consent plugin. The cookies is used to store the user consent for the cookies in the category "Necessary".
cookielawinfo-checkbox-others
11 months
This cookie is set by GDPR Cookie Consent plugin. The cookie is used to store the user consent for the cookies in the category "Other.
cookielawinfo-checkbox-performance
11 months
This cookie is set by GDPR Cookie Consent plugin. The cookie is used to store the user consent for the cookies in the category "Performance".
viewed_cookie_policy
11 months
The cookie is set by the GDPR Cookie Consent plugin and is used to store whether or not user has consented to the use of cookies. It does not store any personal data.
Functional cookies help to perform certain functionalities like sharing the content of the website on social media platforms, collect feedbacks, and other third-party features.
Performance cookies are used to understand and analyze the key performance indexes of the website which helps in delivering a better user experience for the visitors.
Analytical cookies are used to understand how visitors interact with the website. These cookies help provide information on metrics the number of visitors, bounce rate, traffic source, etc.
Advertisement cookies are used to provide visitors with relevant ads and marketing campaigns. These cookies track visitors across websites and collect information to provide customized ads.


![Best CPU For Programming In 2022 [7 Picks For Every Budget]](data:image/svg+xml,%3Csvg%20xmlns='http://www.w3.org/2000/svg'%20viewBox='0%200%20150%20150'%3E%3C/svg%3E "Best CPU For Programming In 2022 [7 Picks For Every Budget]")
![Best CPU For Programming In 2022 [7 Picks For Every Budget]](https://maximum-tech.net/wp-content/uploads/2022/02/best-cpu-for-programming-150x150.jpg "Best CPU For Programming In 2022 [7 Picks For Every Budget]")
![Best Mousepad For High DPI [7 Amazing Picks Reviewed]](https://maximum-tech.net/wp-content/uploads/2022/02/best-mousepad-for-high-dpi-150x150.jpg "Best Mousepad For High DPI [7 Amazing Picks Reviewed]")
![How To Change CPU Fan Speed Without Bios? [Easy Guide]](https://maximum-tech.net/wp-content/uploads/2022/05/How-To-Change-CPU-Fan-Speed-Without-Bios-150x150.jpg "How To Change CPU Fan Speed Without Bios? [Easy Guide]")
![7 Best CPU Under 0 - A Complete Buyer's Guide [2022]](https://maximum-tech.net/wp-content/uploads/2022/01/best-cpu-under-200-150x150.jpg "7 Best CPU Under 0 - A Complete Buyer's Guide [2022]")
![Best CPU for Minecraft In 2022 [7 Worthy Picks Reviewed]](https://maximum-tech.net/wp-content/uploads/2022/04/best-cpu-for-minecraft-150x150.jpg "Best CPU for Minecraft In 2022 [7 Worthy Picks Reviewed]")
![Best CPU For GTX 1660 Super - An Expert Buyer's Guide [2022]](https://maximum-tech.net/wp-content/uploads/2022/02/best-cpu-for-gtx-1660-super-150x150.jpg "Best CPU For GTX 1660 Super - An Expert Buyer's Guide [2022]")